This is my capstone project, completed in 2023 for my Bachelor of Science in Industrial Design from the University of Cincinnati, DAAP.
For more background, please see my first exploration of bicycle frame building here.
After building my first bike frame in the Spring of 2021 and spending a year testing it, I wanted to use my capstone project to further explore bicycle frame building, and approach small-scale bike fabrication as a system design question.
Research - Past Bike
Images and specs of the Cryptid V1 Bike were shared on mountain biking forums in search of broad feedback. Additionally, a few experienced mountain bikers took it for a test bike, and provided me with valuable feedback.

Research - Frame Builders
I met with a few highly respected bicycle frame builders to learn about their process, their pain points, and what guidance they could offer to someone trying to take a fresh look at frame building. A common trend was customer relationships, selling a story, and developing modern 3D CAD workflows.

Design focus areas and deliverables

Branding Development
Building on past brand development, I identified an opportunity to create an identifiable character to represent the Cryptid Brand. The name Cryptid refers to the creatures of legend that haunt forests around the world. Some who are lucky may have a fleeting encounter. Cryptid is a brand building legendary bikes, for those lucky to ride them.

Cryptkeeper Frame Fixture
Frame Design System - The Cryptkeeper Frame Fixture
The backbone of this project, the Cryptkeeper Frame Fixture, is a system that improves the design and fabrication workflow for bike building. The system takes rider body dimensions, fit preferences, and riding style, and then delivers a series of values that drive the bike frame design. These values then generate a full 3D CAD model of the bike, allowing the builder to further tweak the design. This is especially useful for frame builders incorporating metal 3D printing into their designs.


Hardcore Hardtail
Bike One: Hardcore Hardtail
The first bike was a relatively simple hardail mountain bike for a beginner mountain biker but an experienced cyclist. This bike would serve as a great test for the frame fixture system. Additionally, it would provide an interesting challenge, as the rider was unusually to small to fit any of the models offered by big brands.

Hardcore Hardtail Design Refinement
As both bikes would be made of steel, I was limited by the forms that the frame could take. I used this opportunity to explore some of the fine details of the bike, as well as how some human factors considerations could improve the rider interactions.


Full Suspension
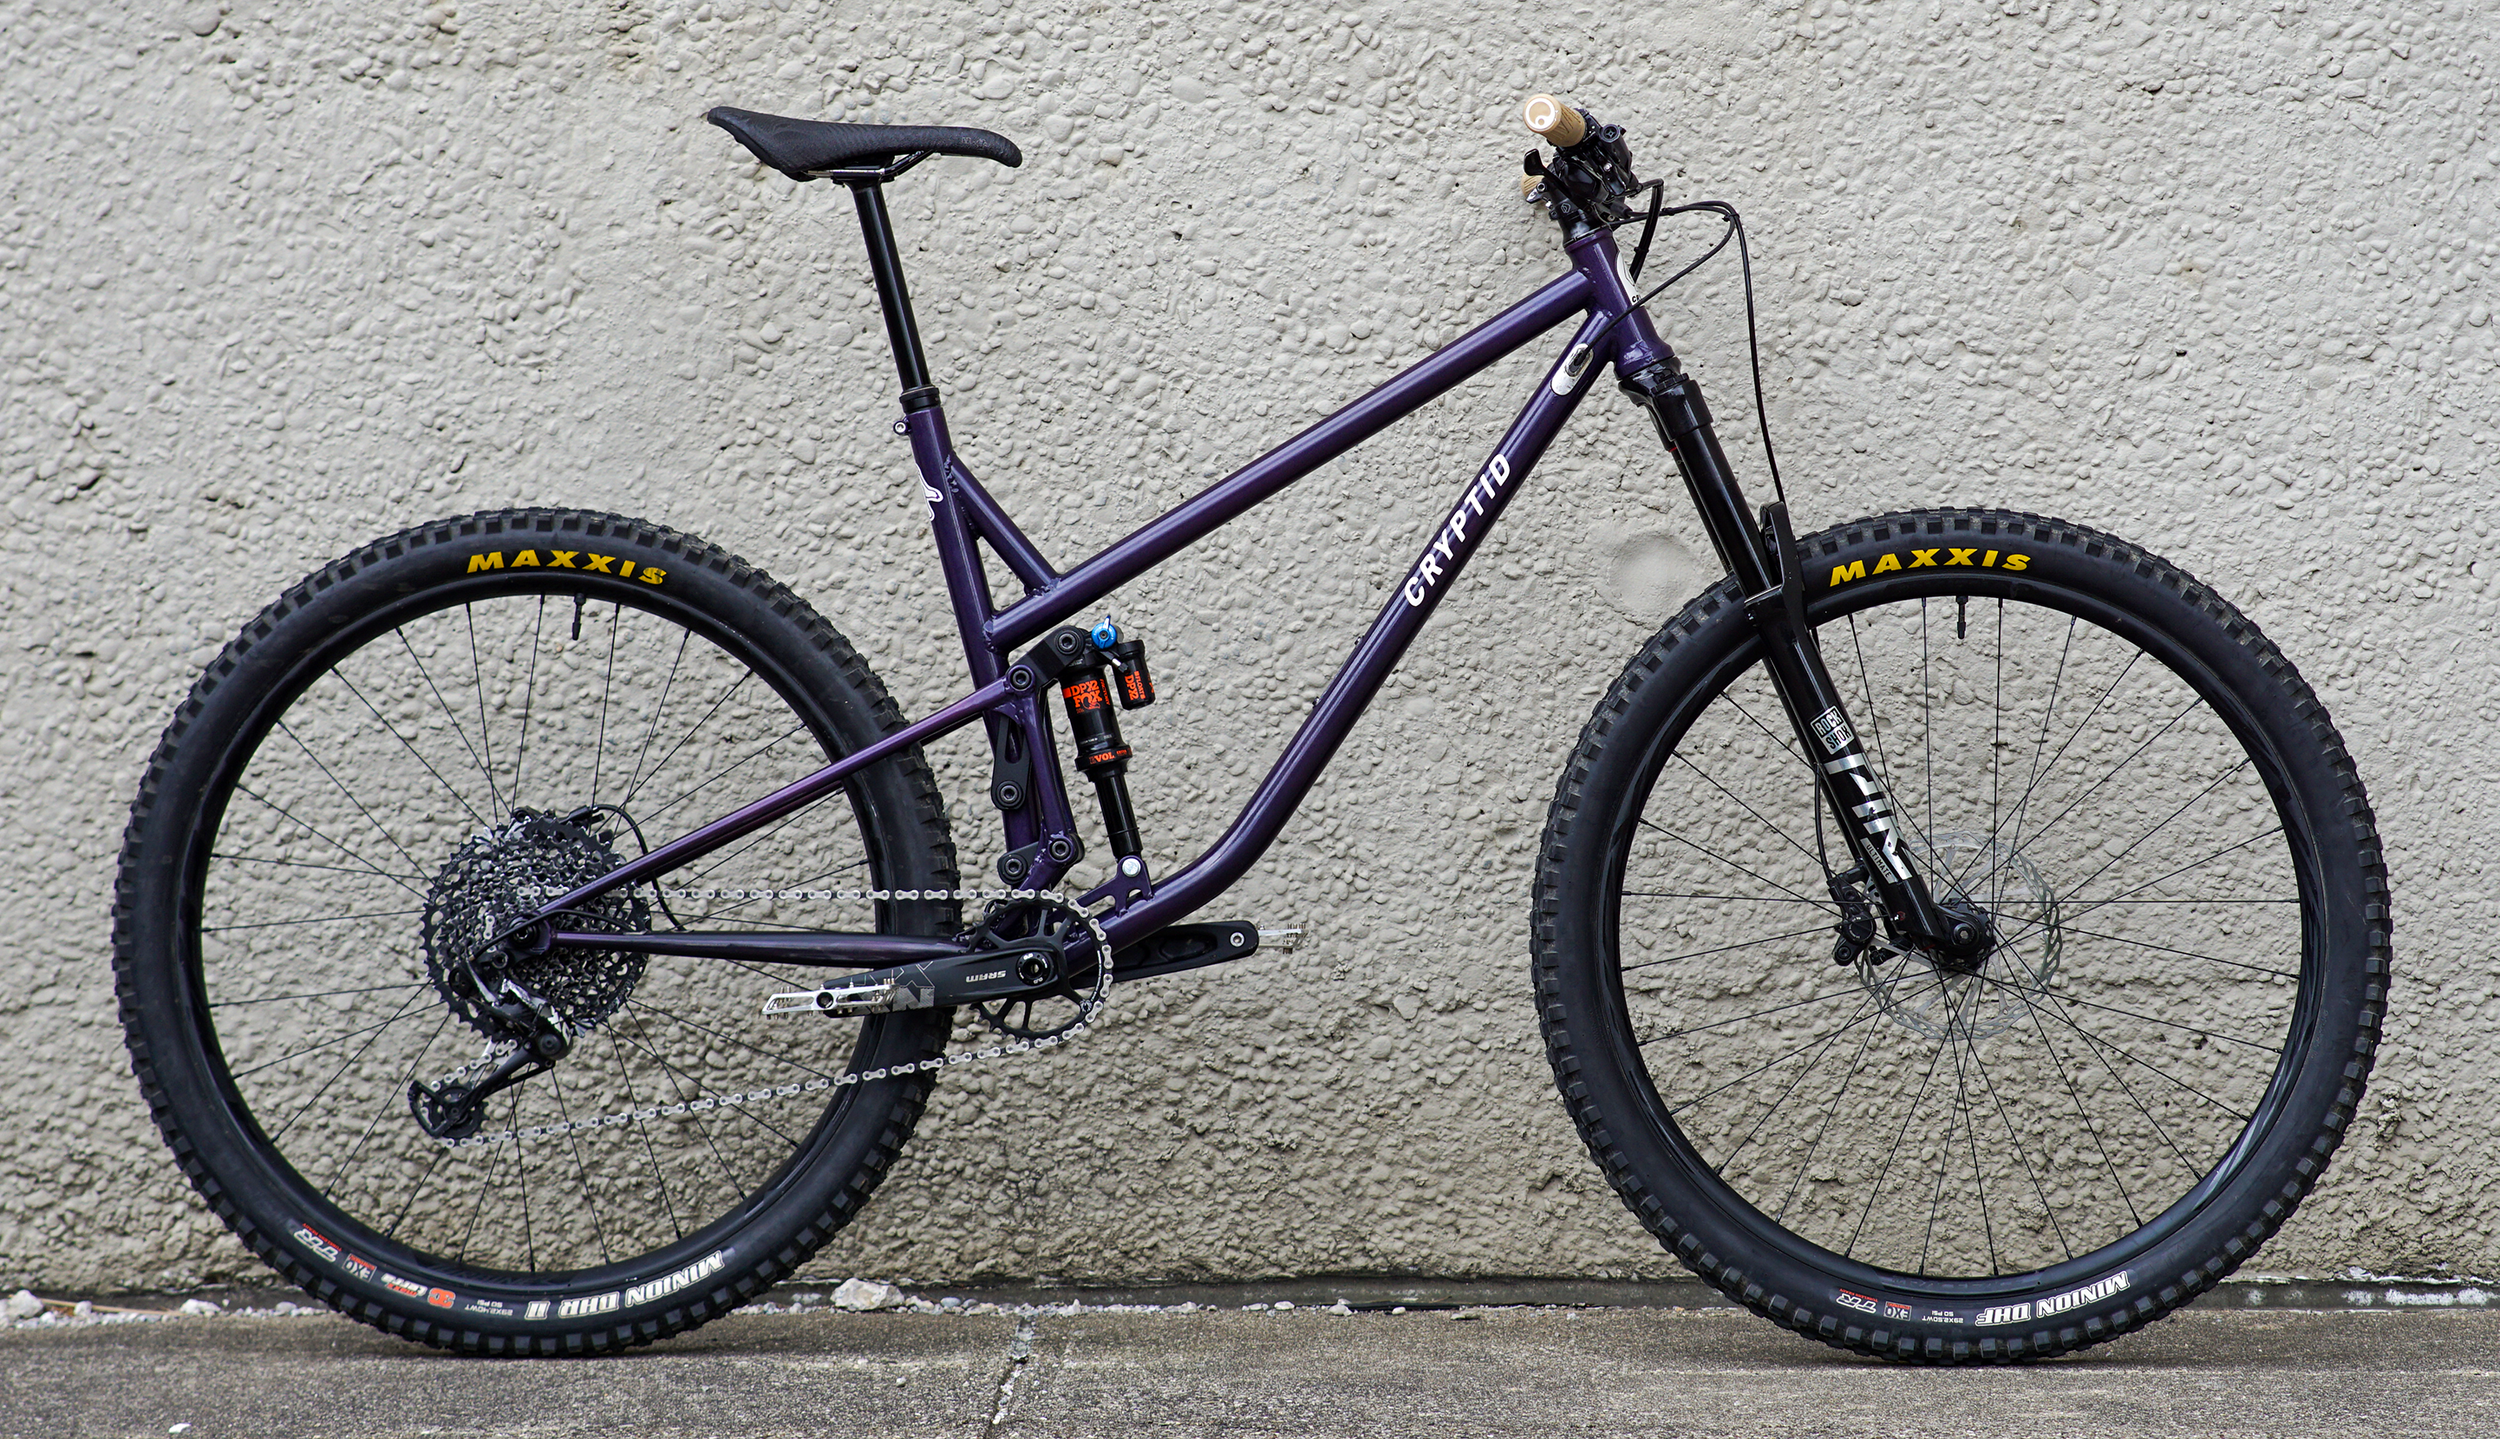
Bike Two: Full Suspension
The goal of the second bike was to push my technical abilities as far as possible while improving on every aspect of the previous full-suspension bike. This was done by adjusting the geometry to be more playful, and the body position to be more comfortable when pedalling.

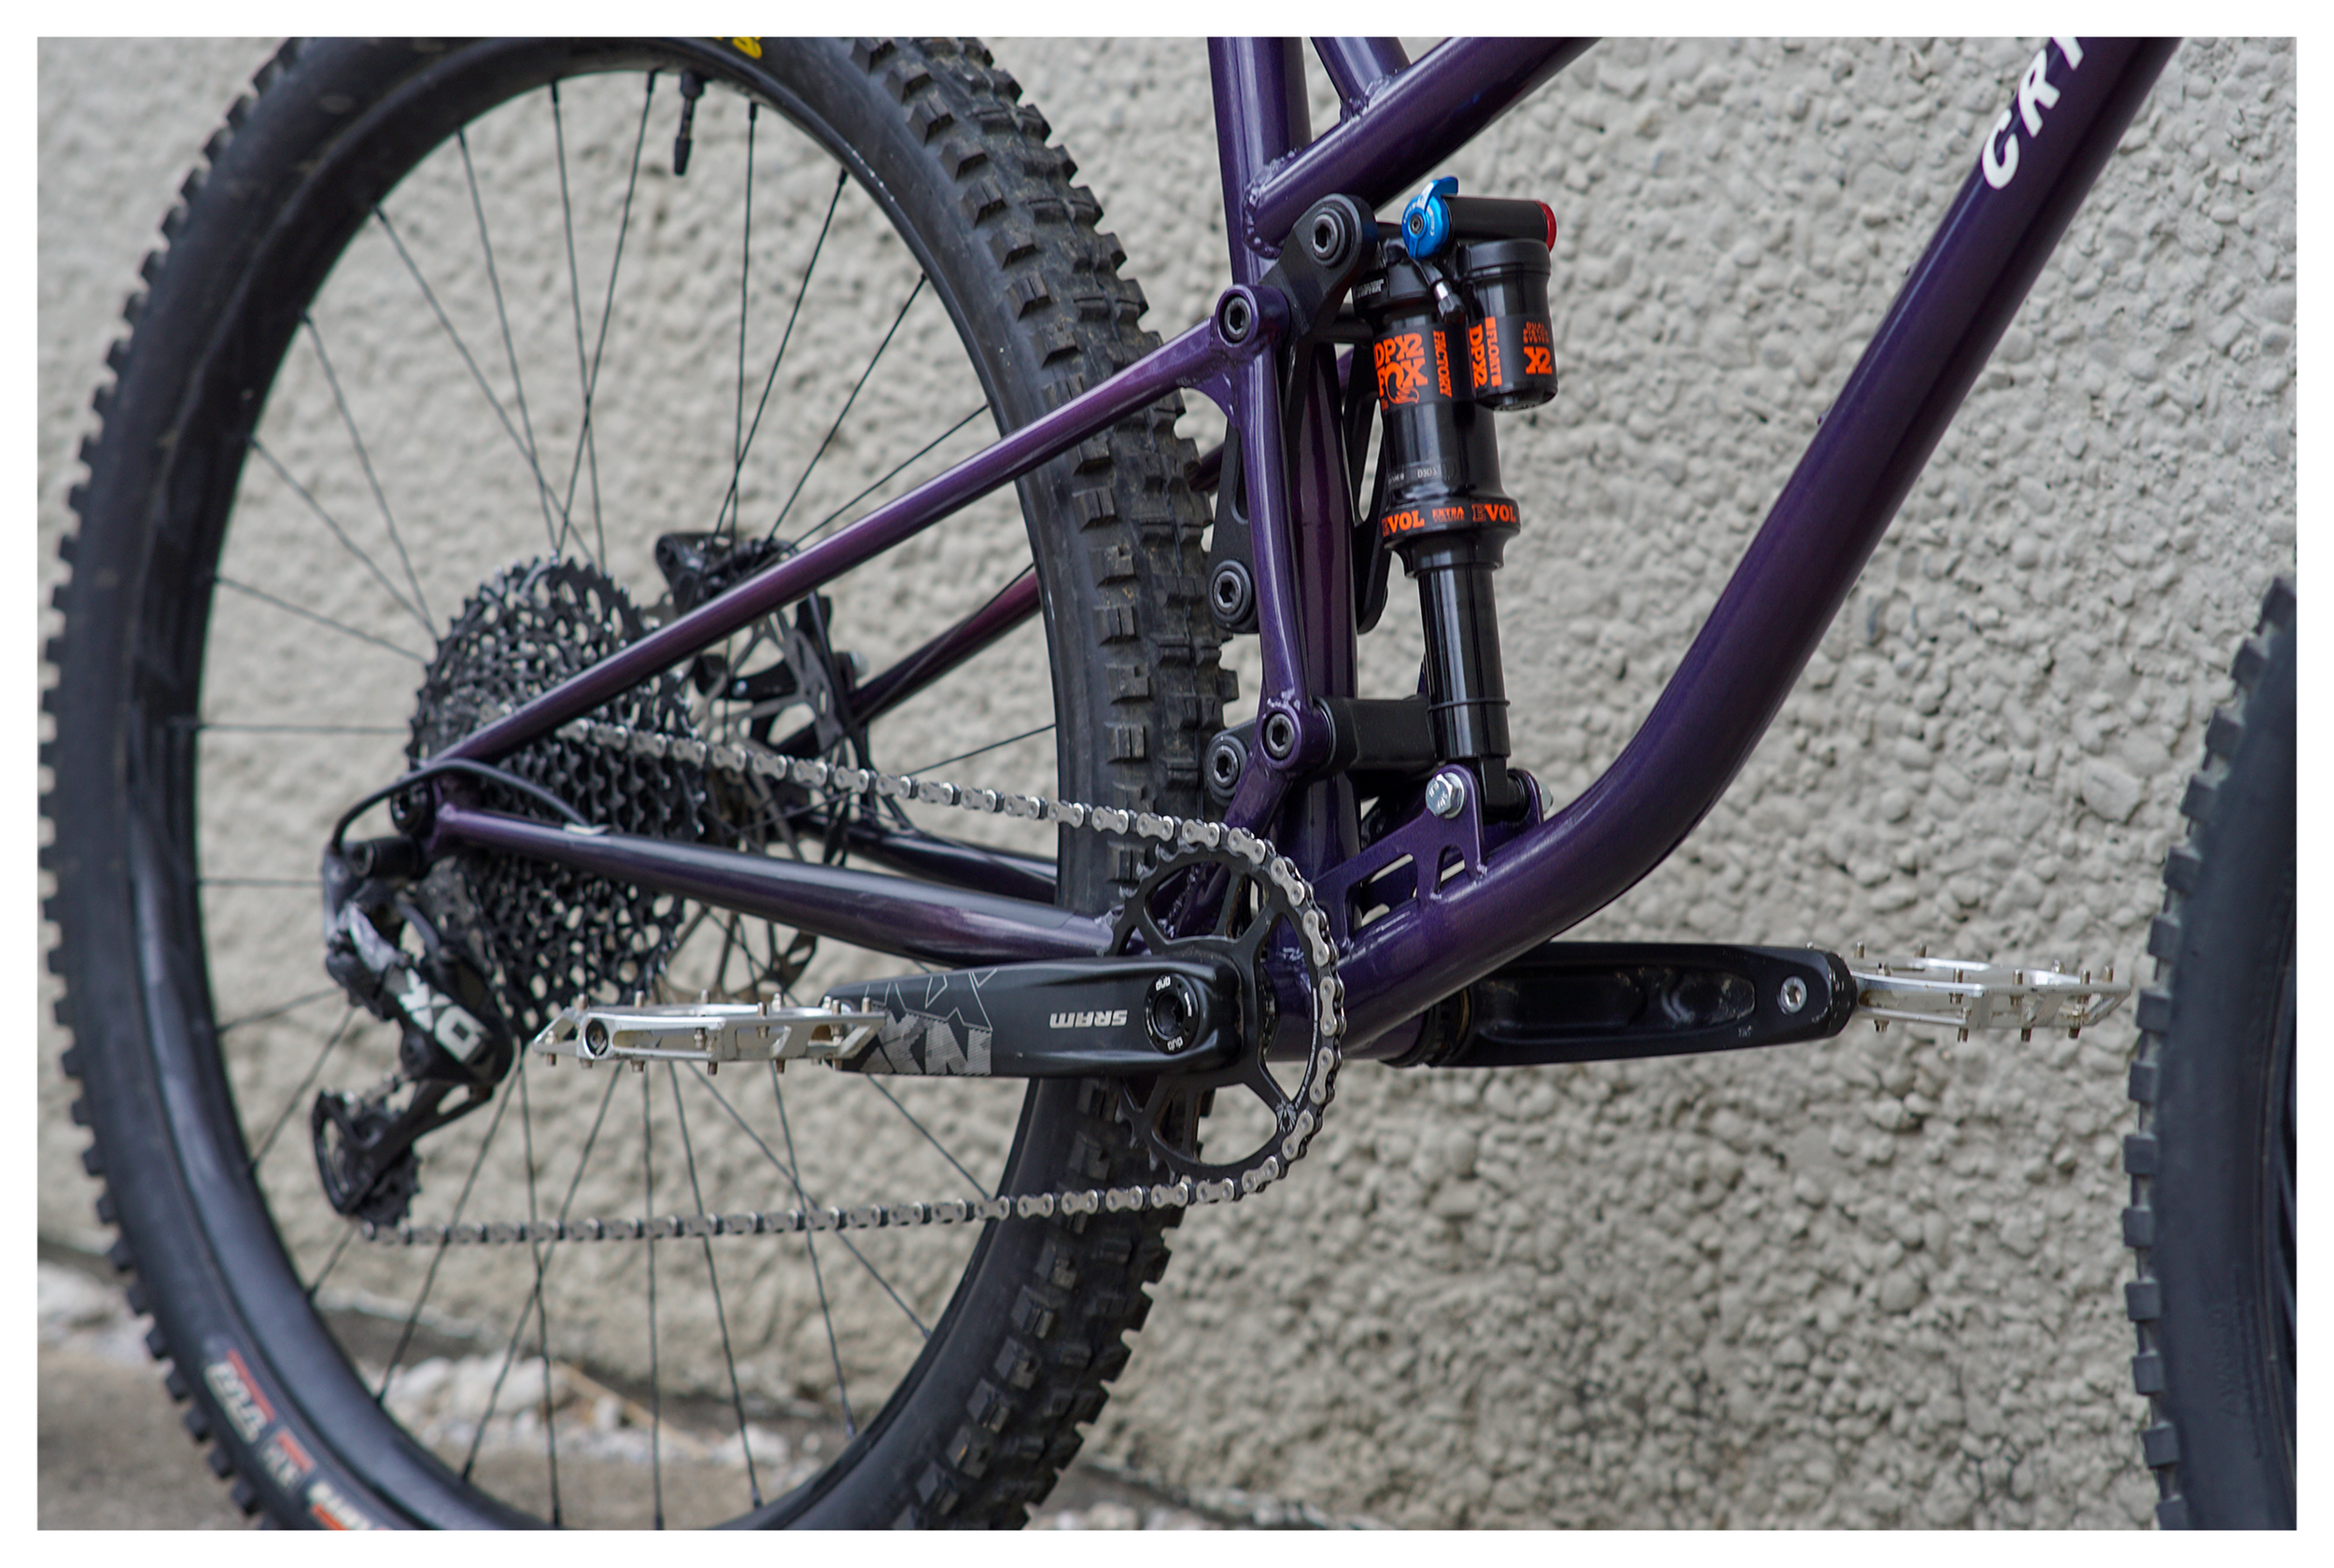
Suspension Kinematics Design
Chris Currie, Founder of Ministry Cycles and designer of the 3VO suspension was kind enough to let me use his patented technology for this project. He assisted me in tuning the location of the suspension pivot points- changes of 1mm can dramatically change the suspension performance. This layout optimizes pedaling efficiency. While only offering 140mm of travel, its progressive nature allows it to tackle large bumps and drops.

Full Suspension Design Refinement
As with the Hardcore Hardtail, the steel tubing limits the forms that can be achieved with the bike frame. However, there were still opportunities to refine details like the suspension links, reinforcements, and bend locations.

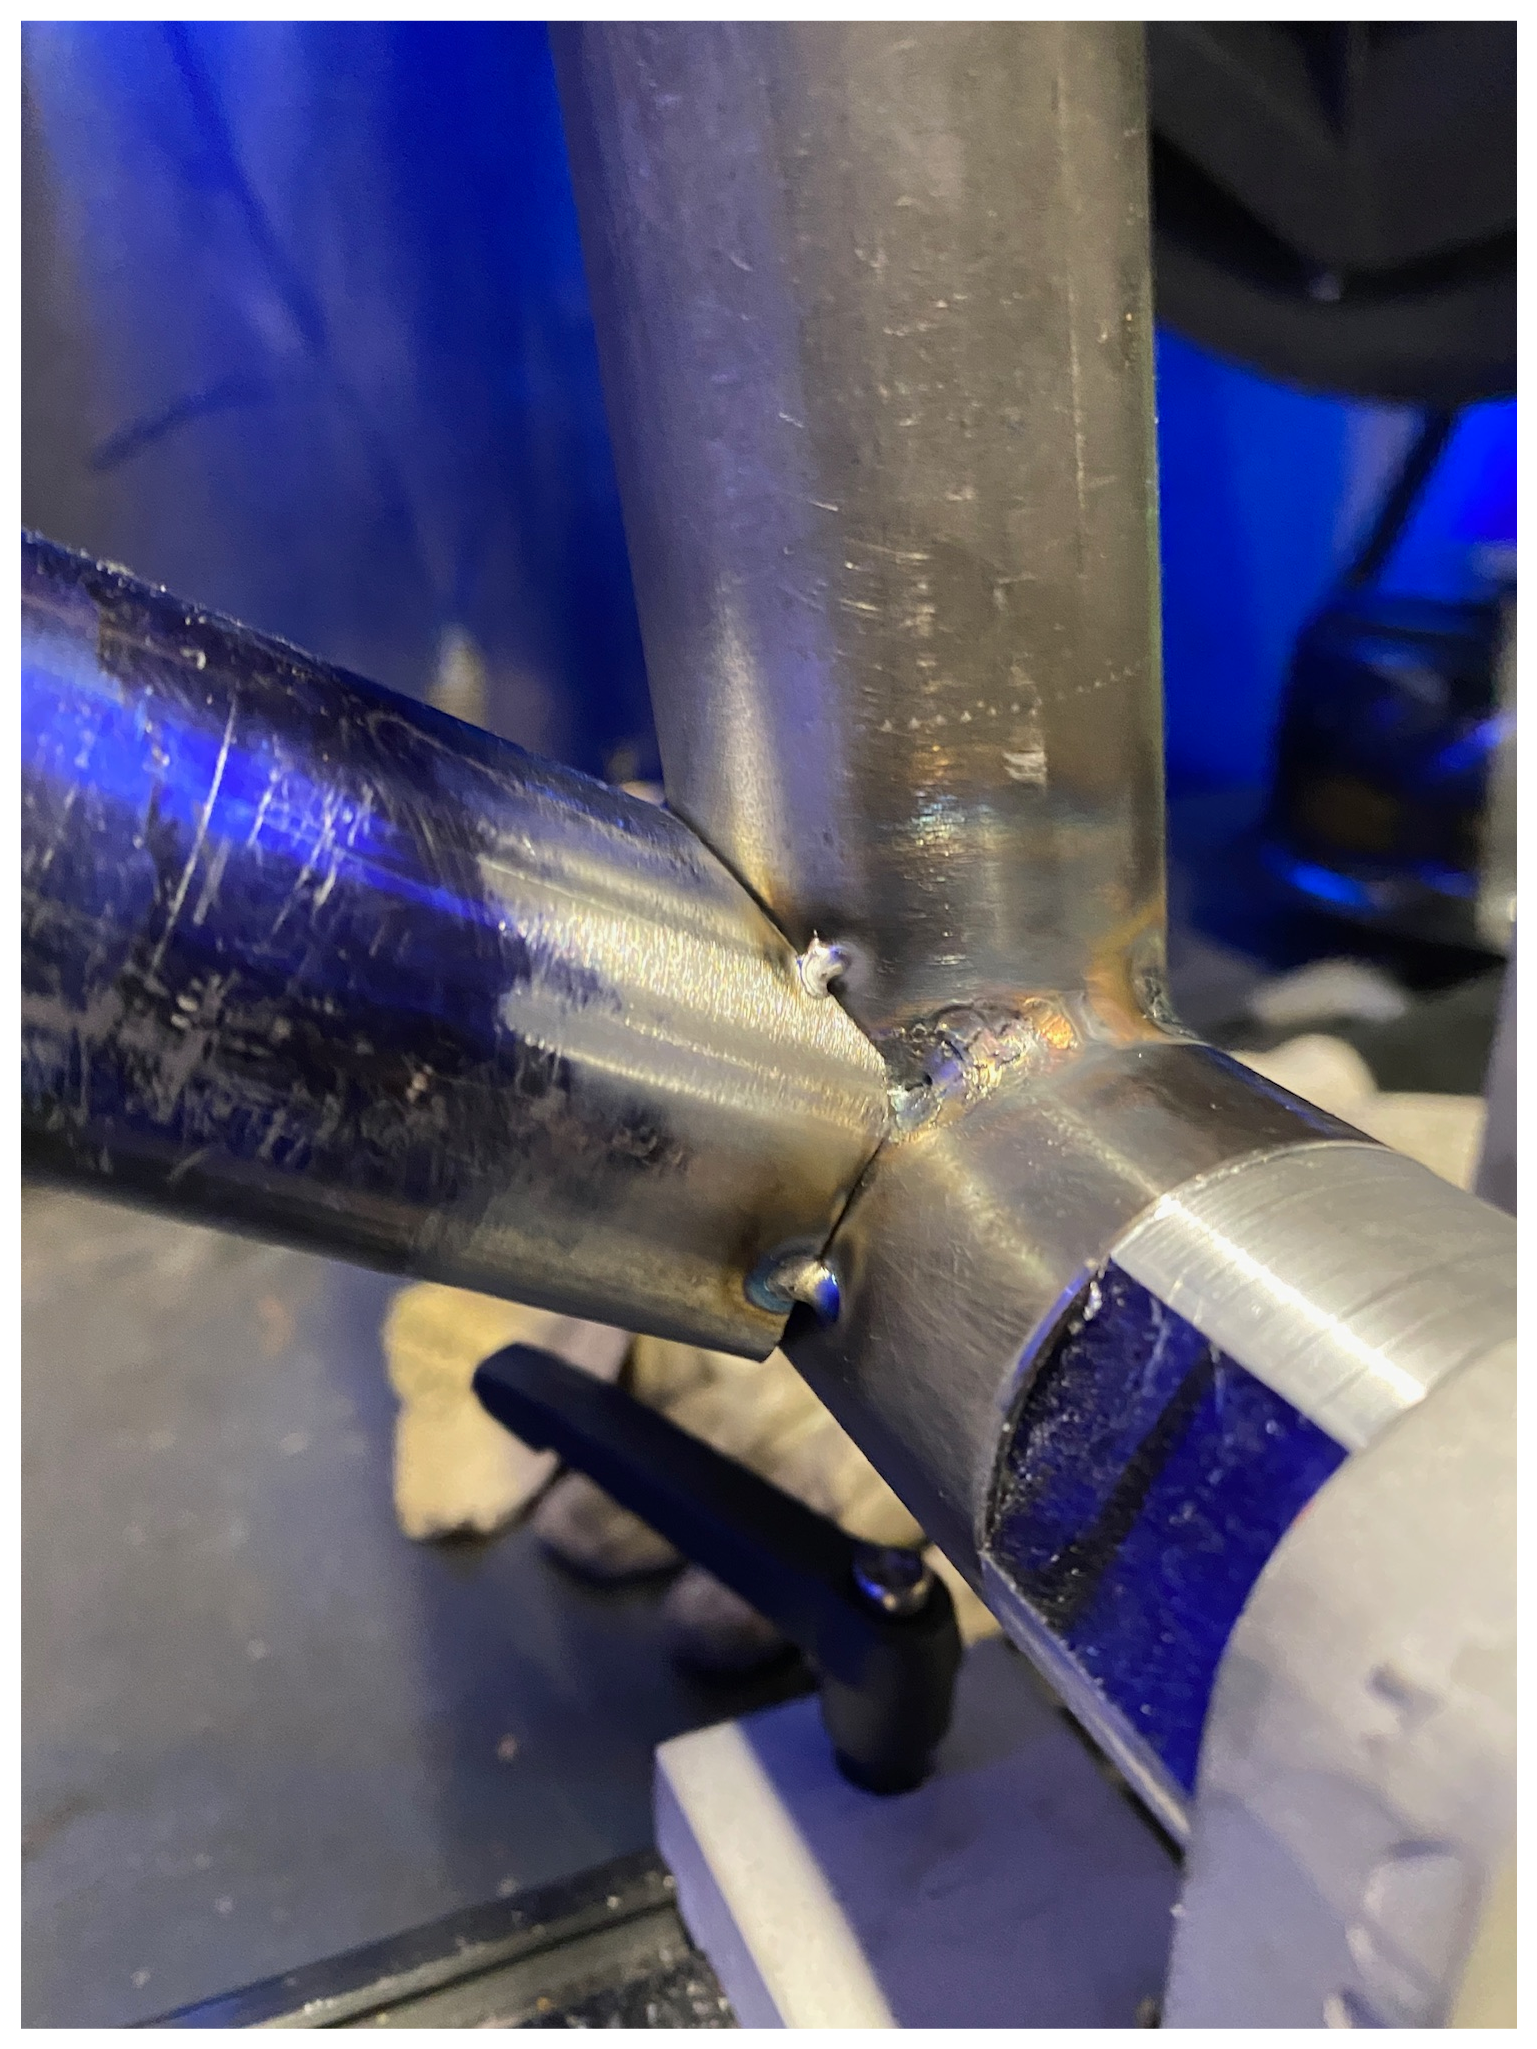
Frame Fabrication
The frame assembly was similar to that of the Hardcore Hardtail, however, some additional fixtures were used to locate the suspension pivot points. After the front and rear triangles were welded, the cable routing and water bottle mounts were brazed on with silver. Finally, the frame was given a durable 3 stage powder coat finish.


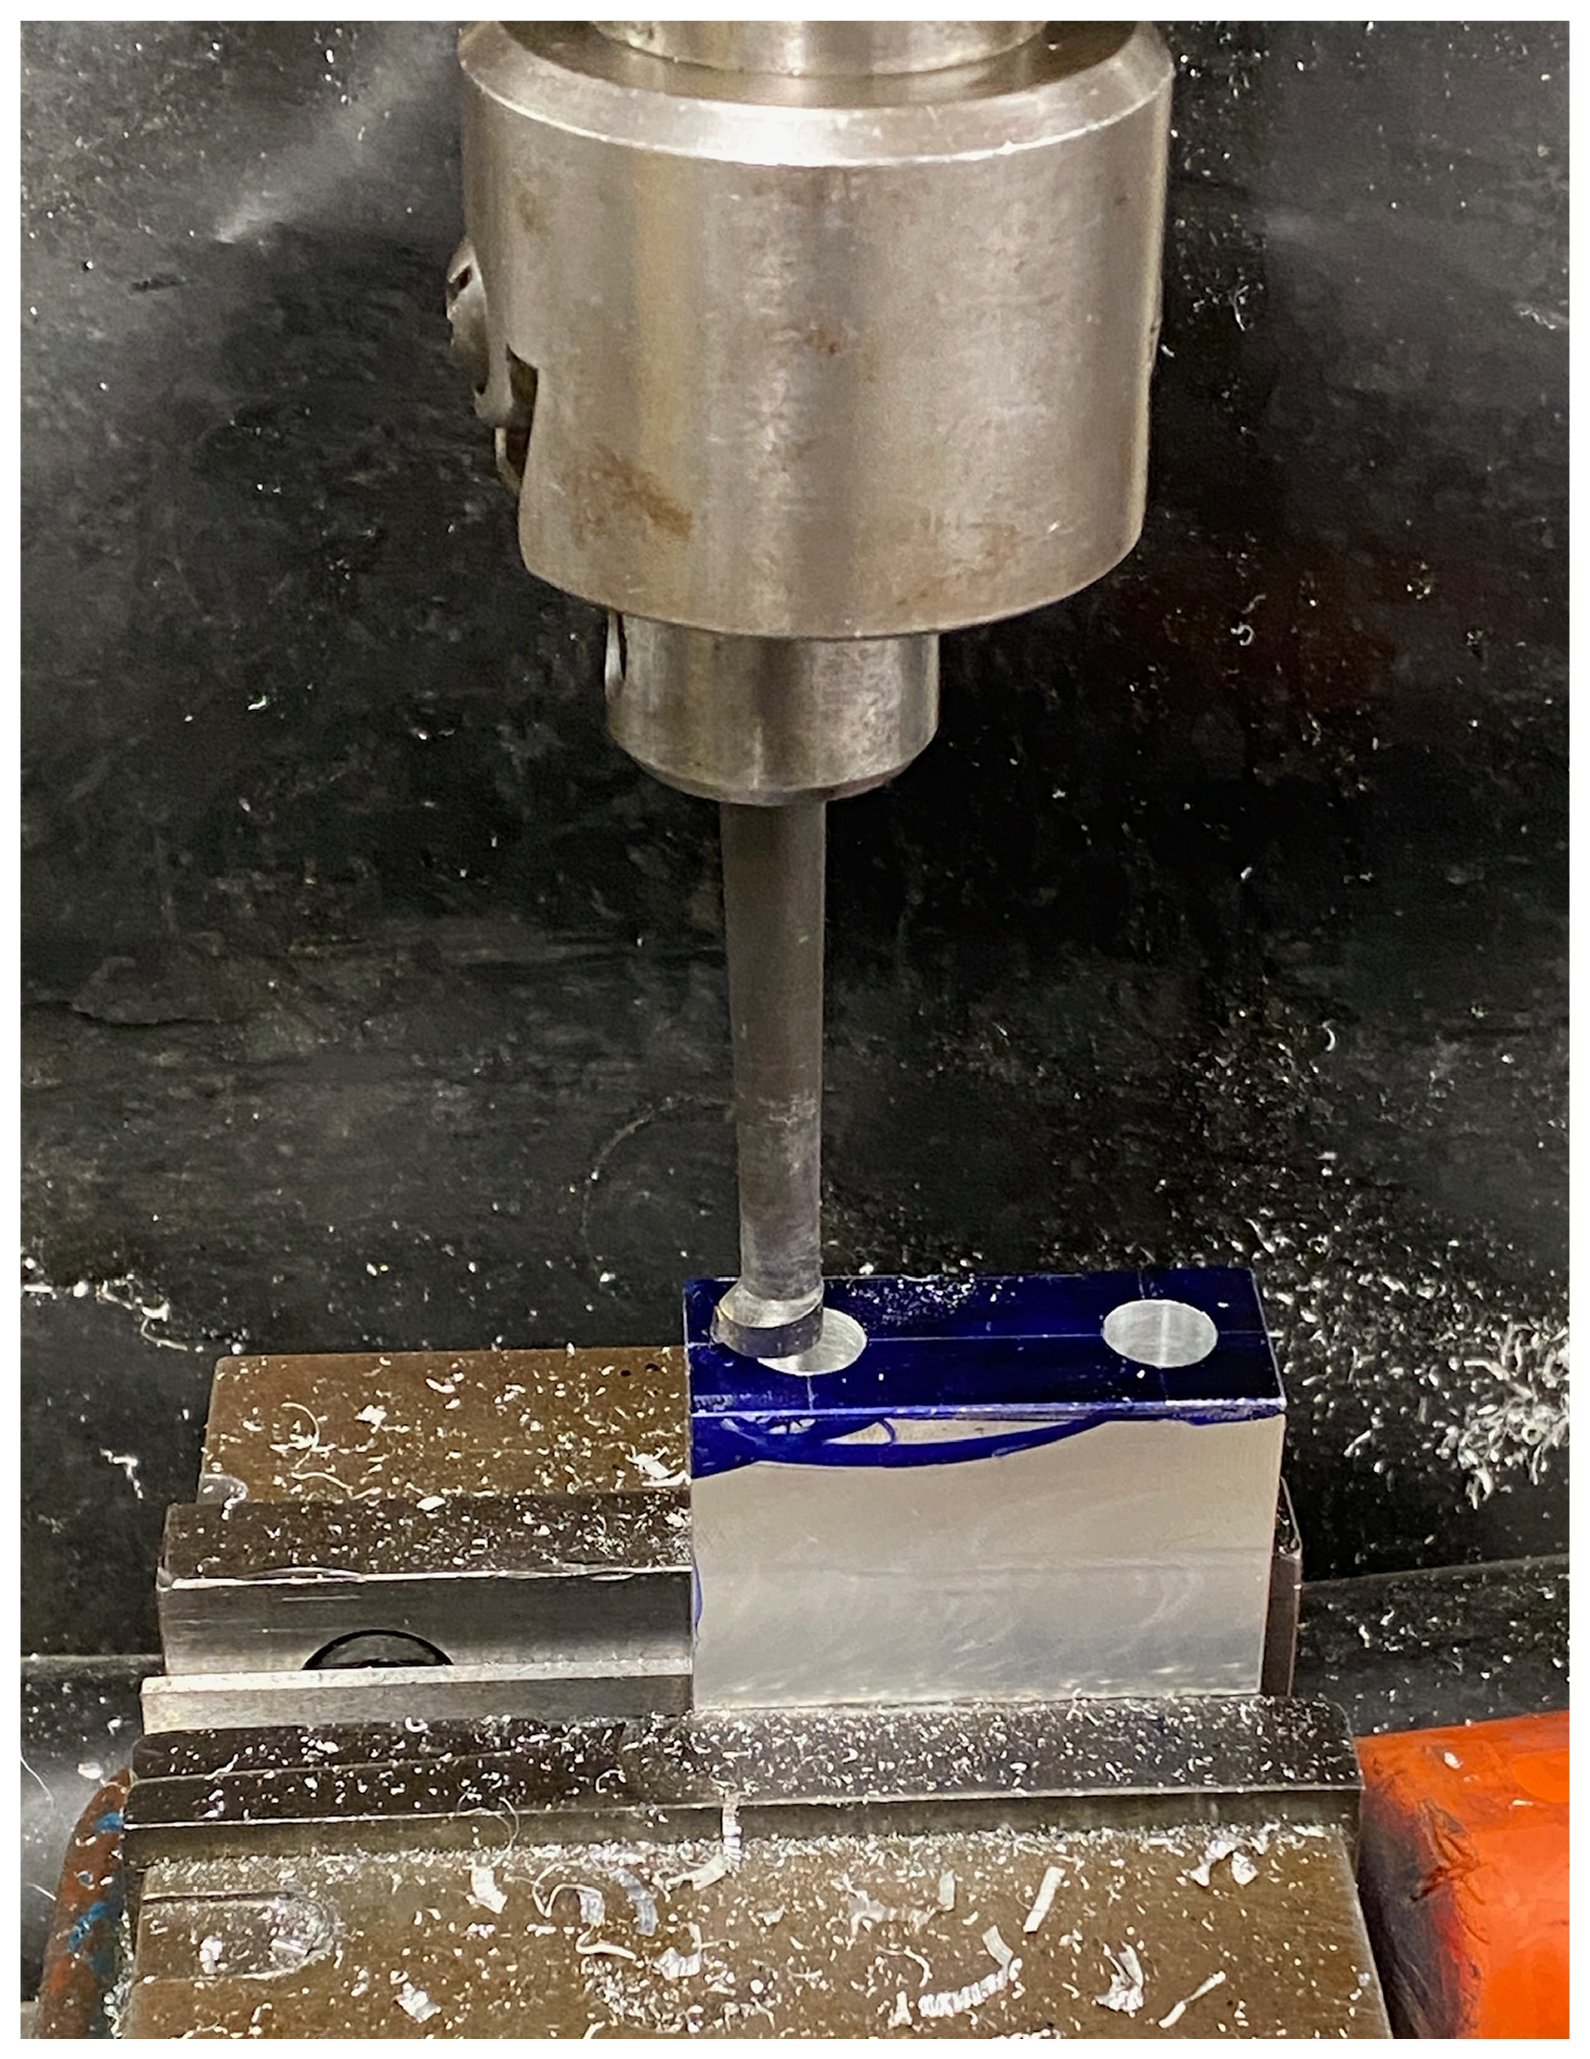
Suspension Fabrication
After the main frame components were finished, a 3D-printed test model of the suspension links let me confirm that everything would fit up and move nicely. By this point, all available CNC machines were booked up, so I used a manual mill and lathe to machine the final linkages and hardware from aluminum. After the links were finished, I circled back to the frame fabrication to tie together the rear triangle.


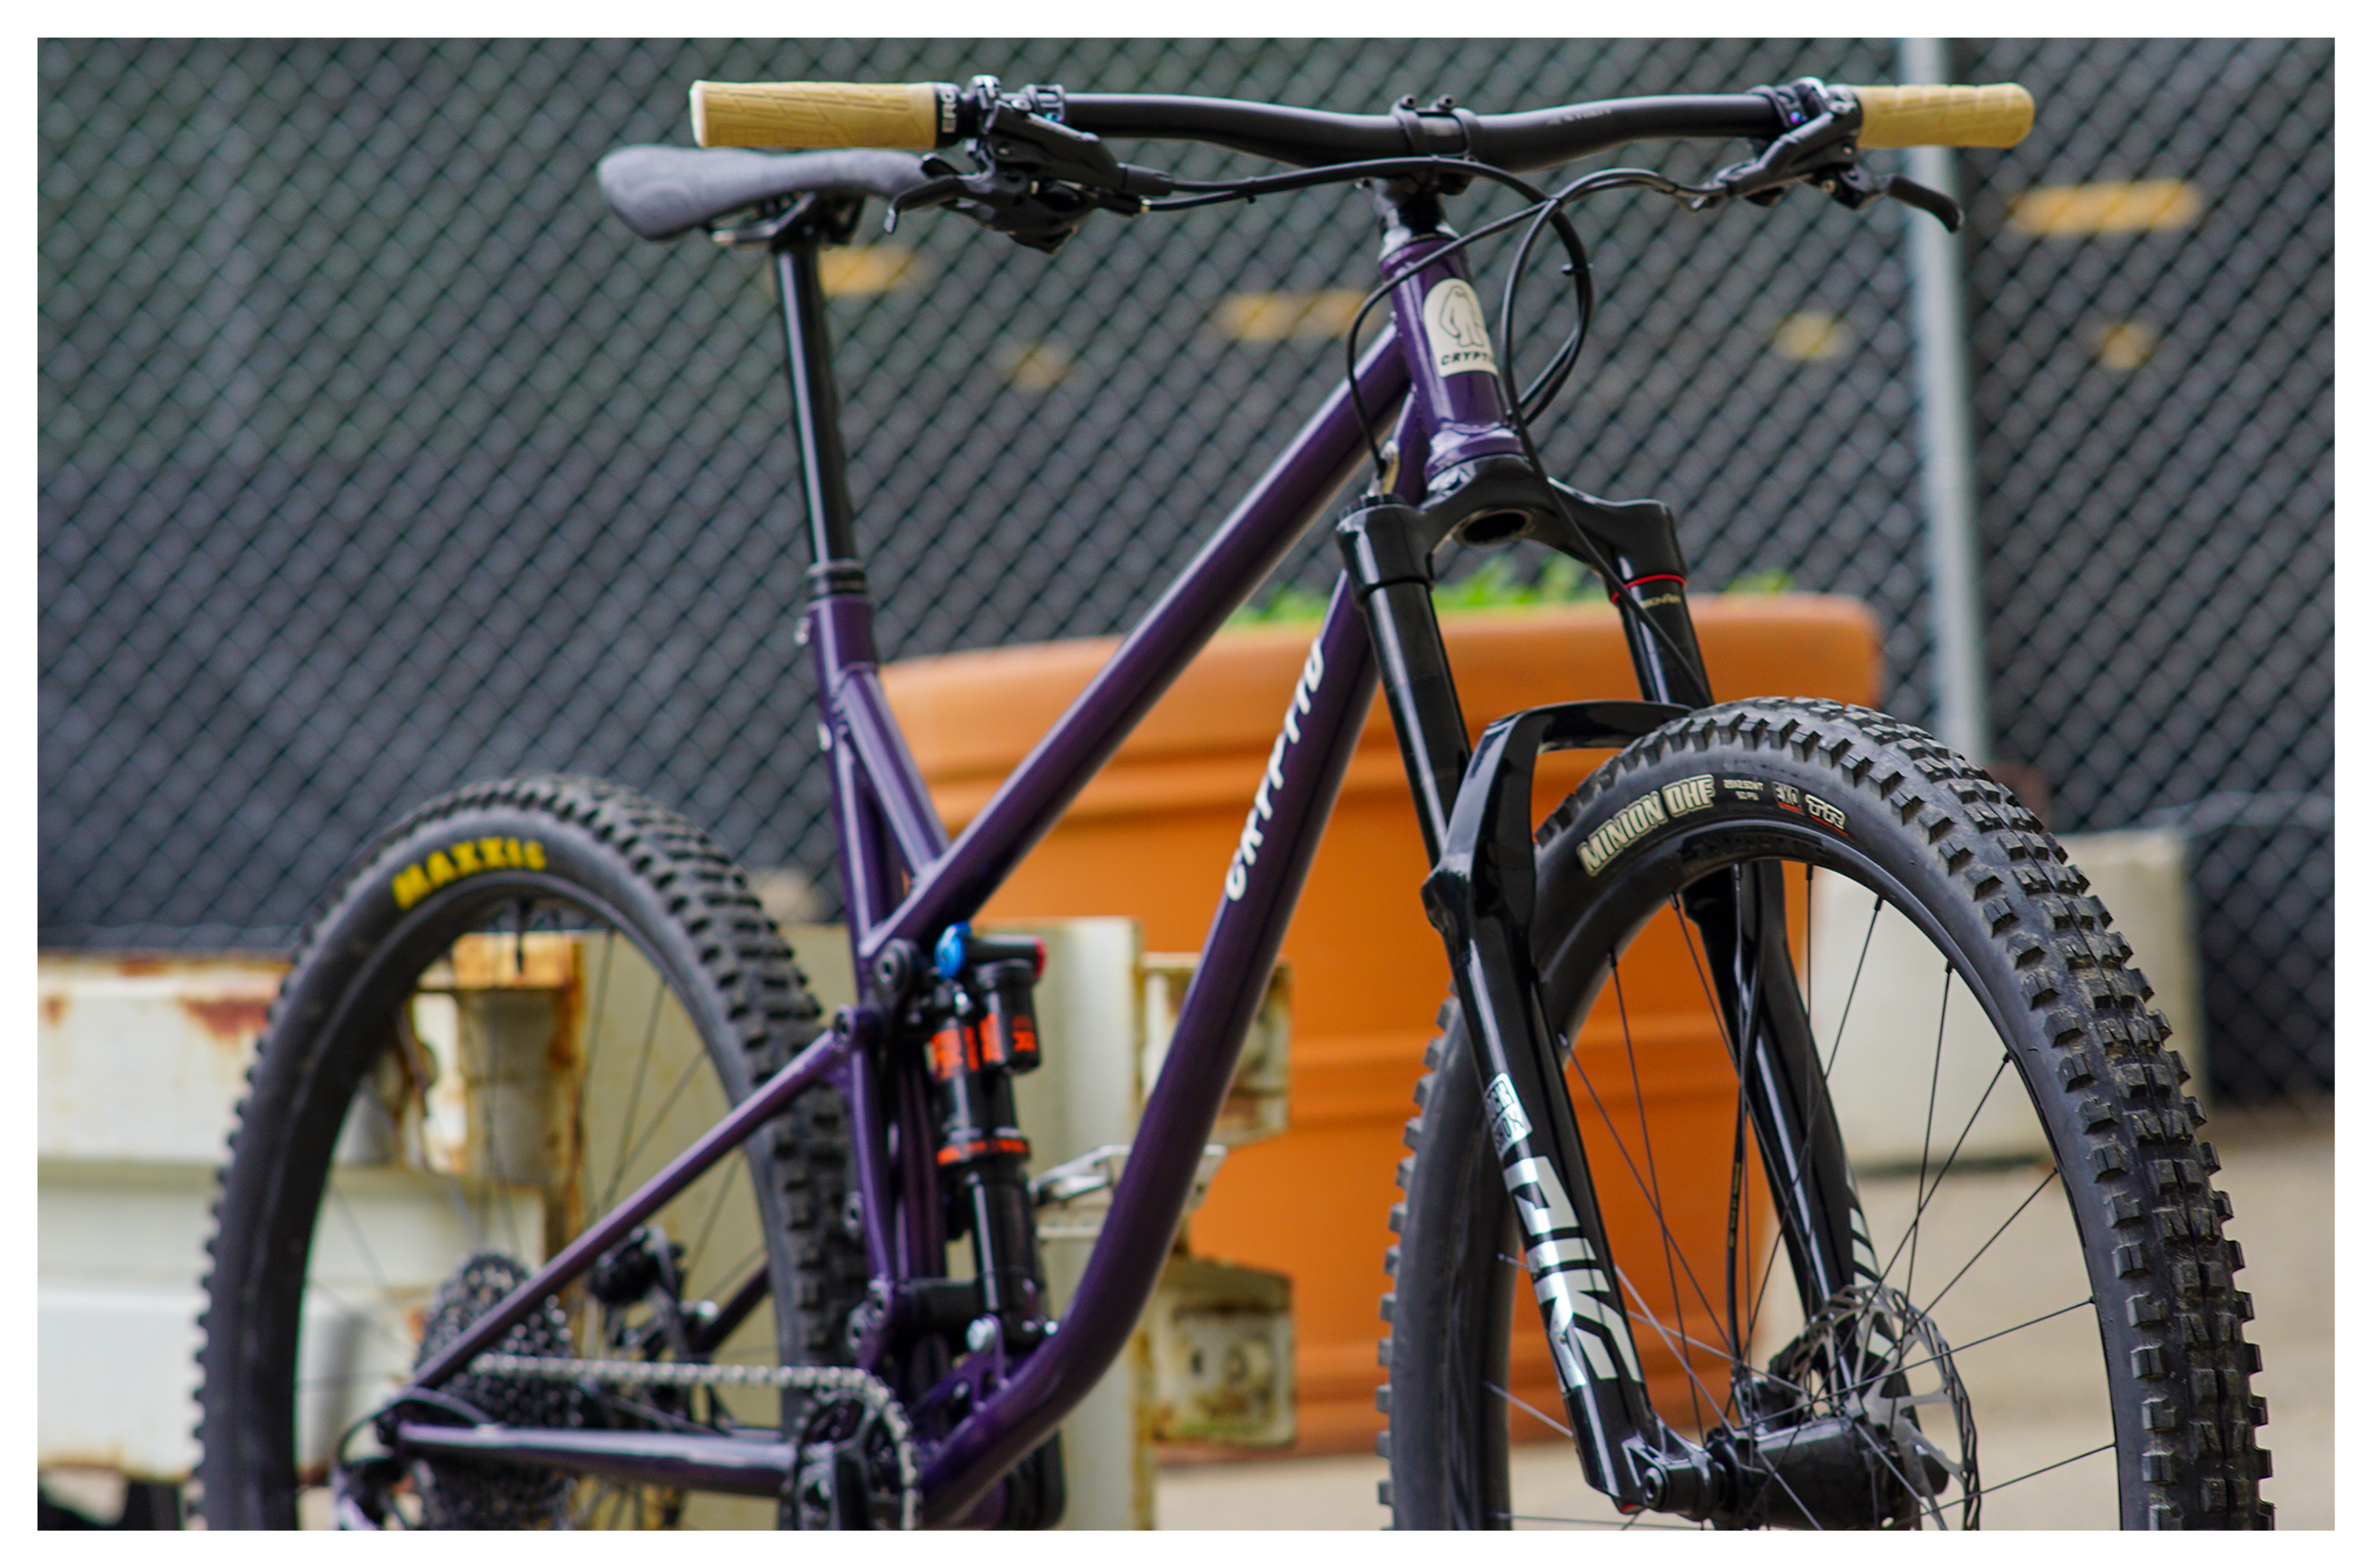
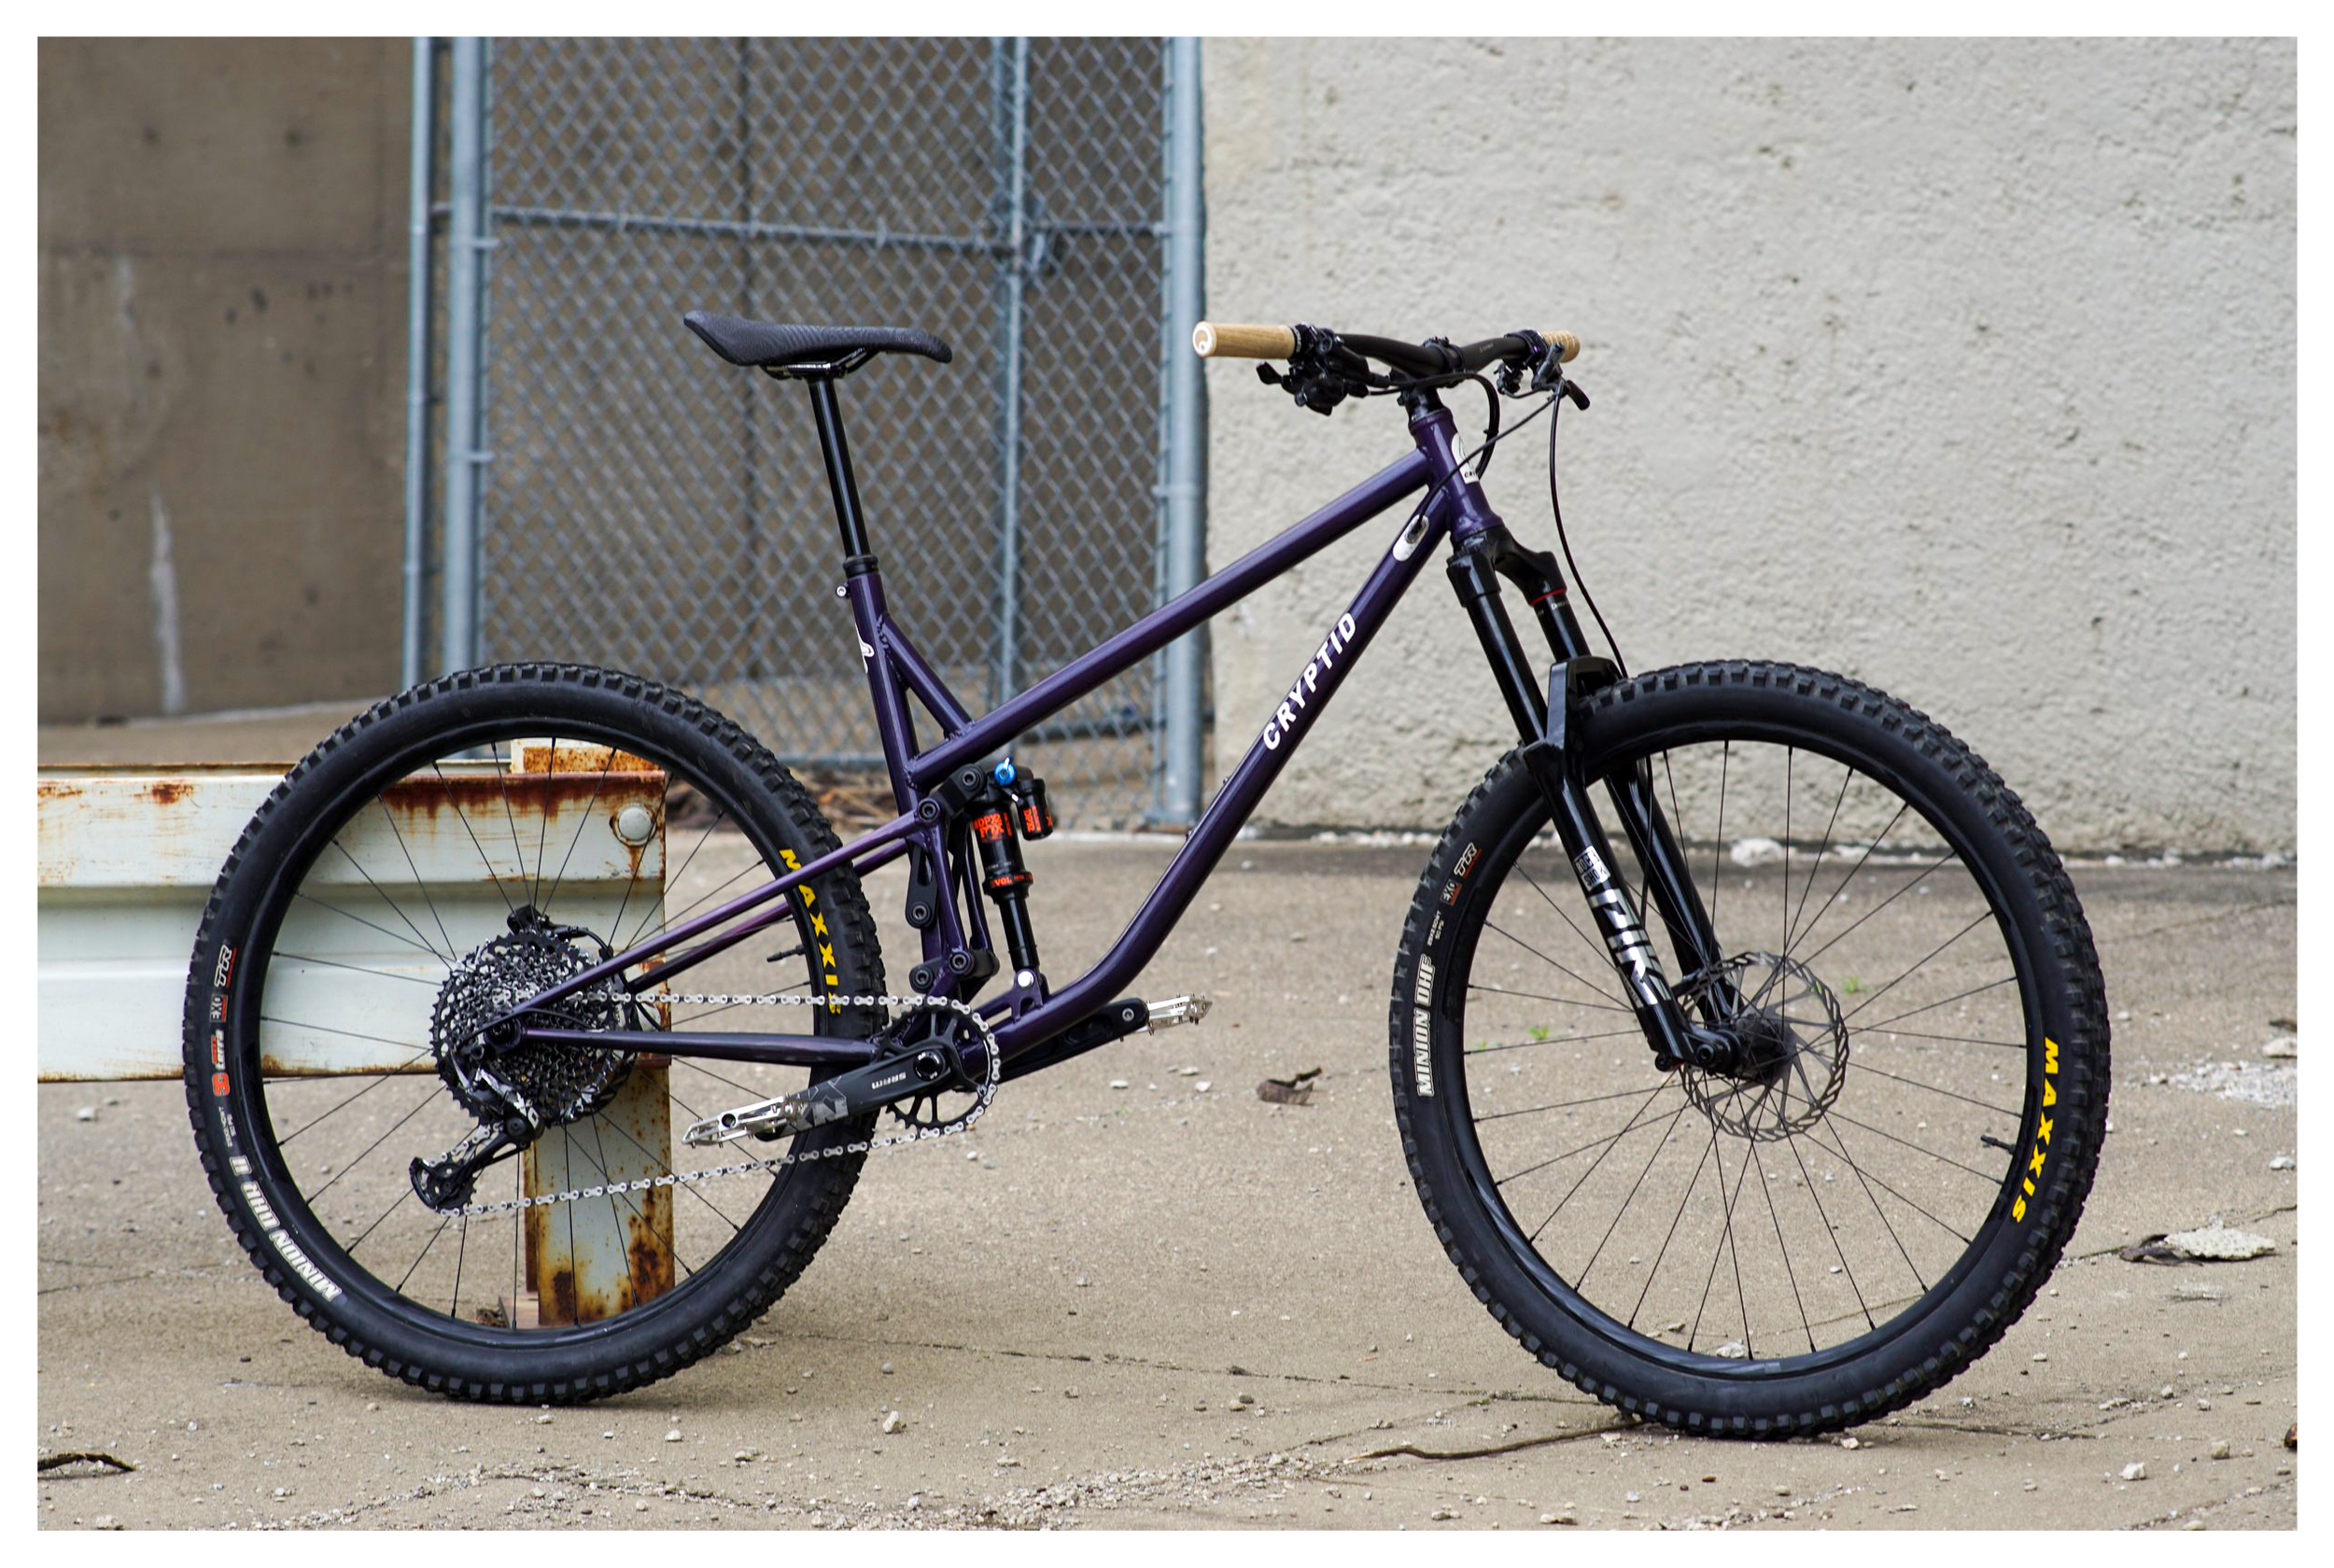
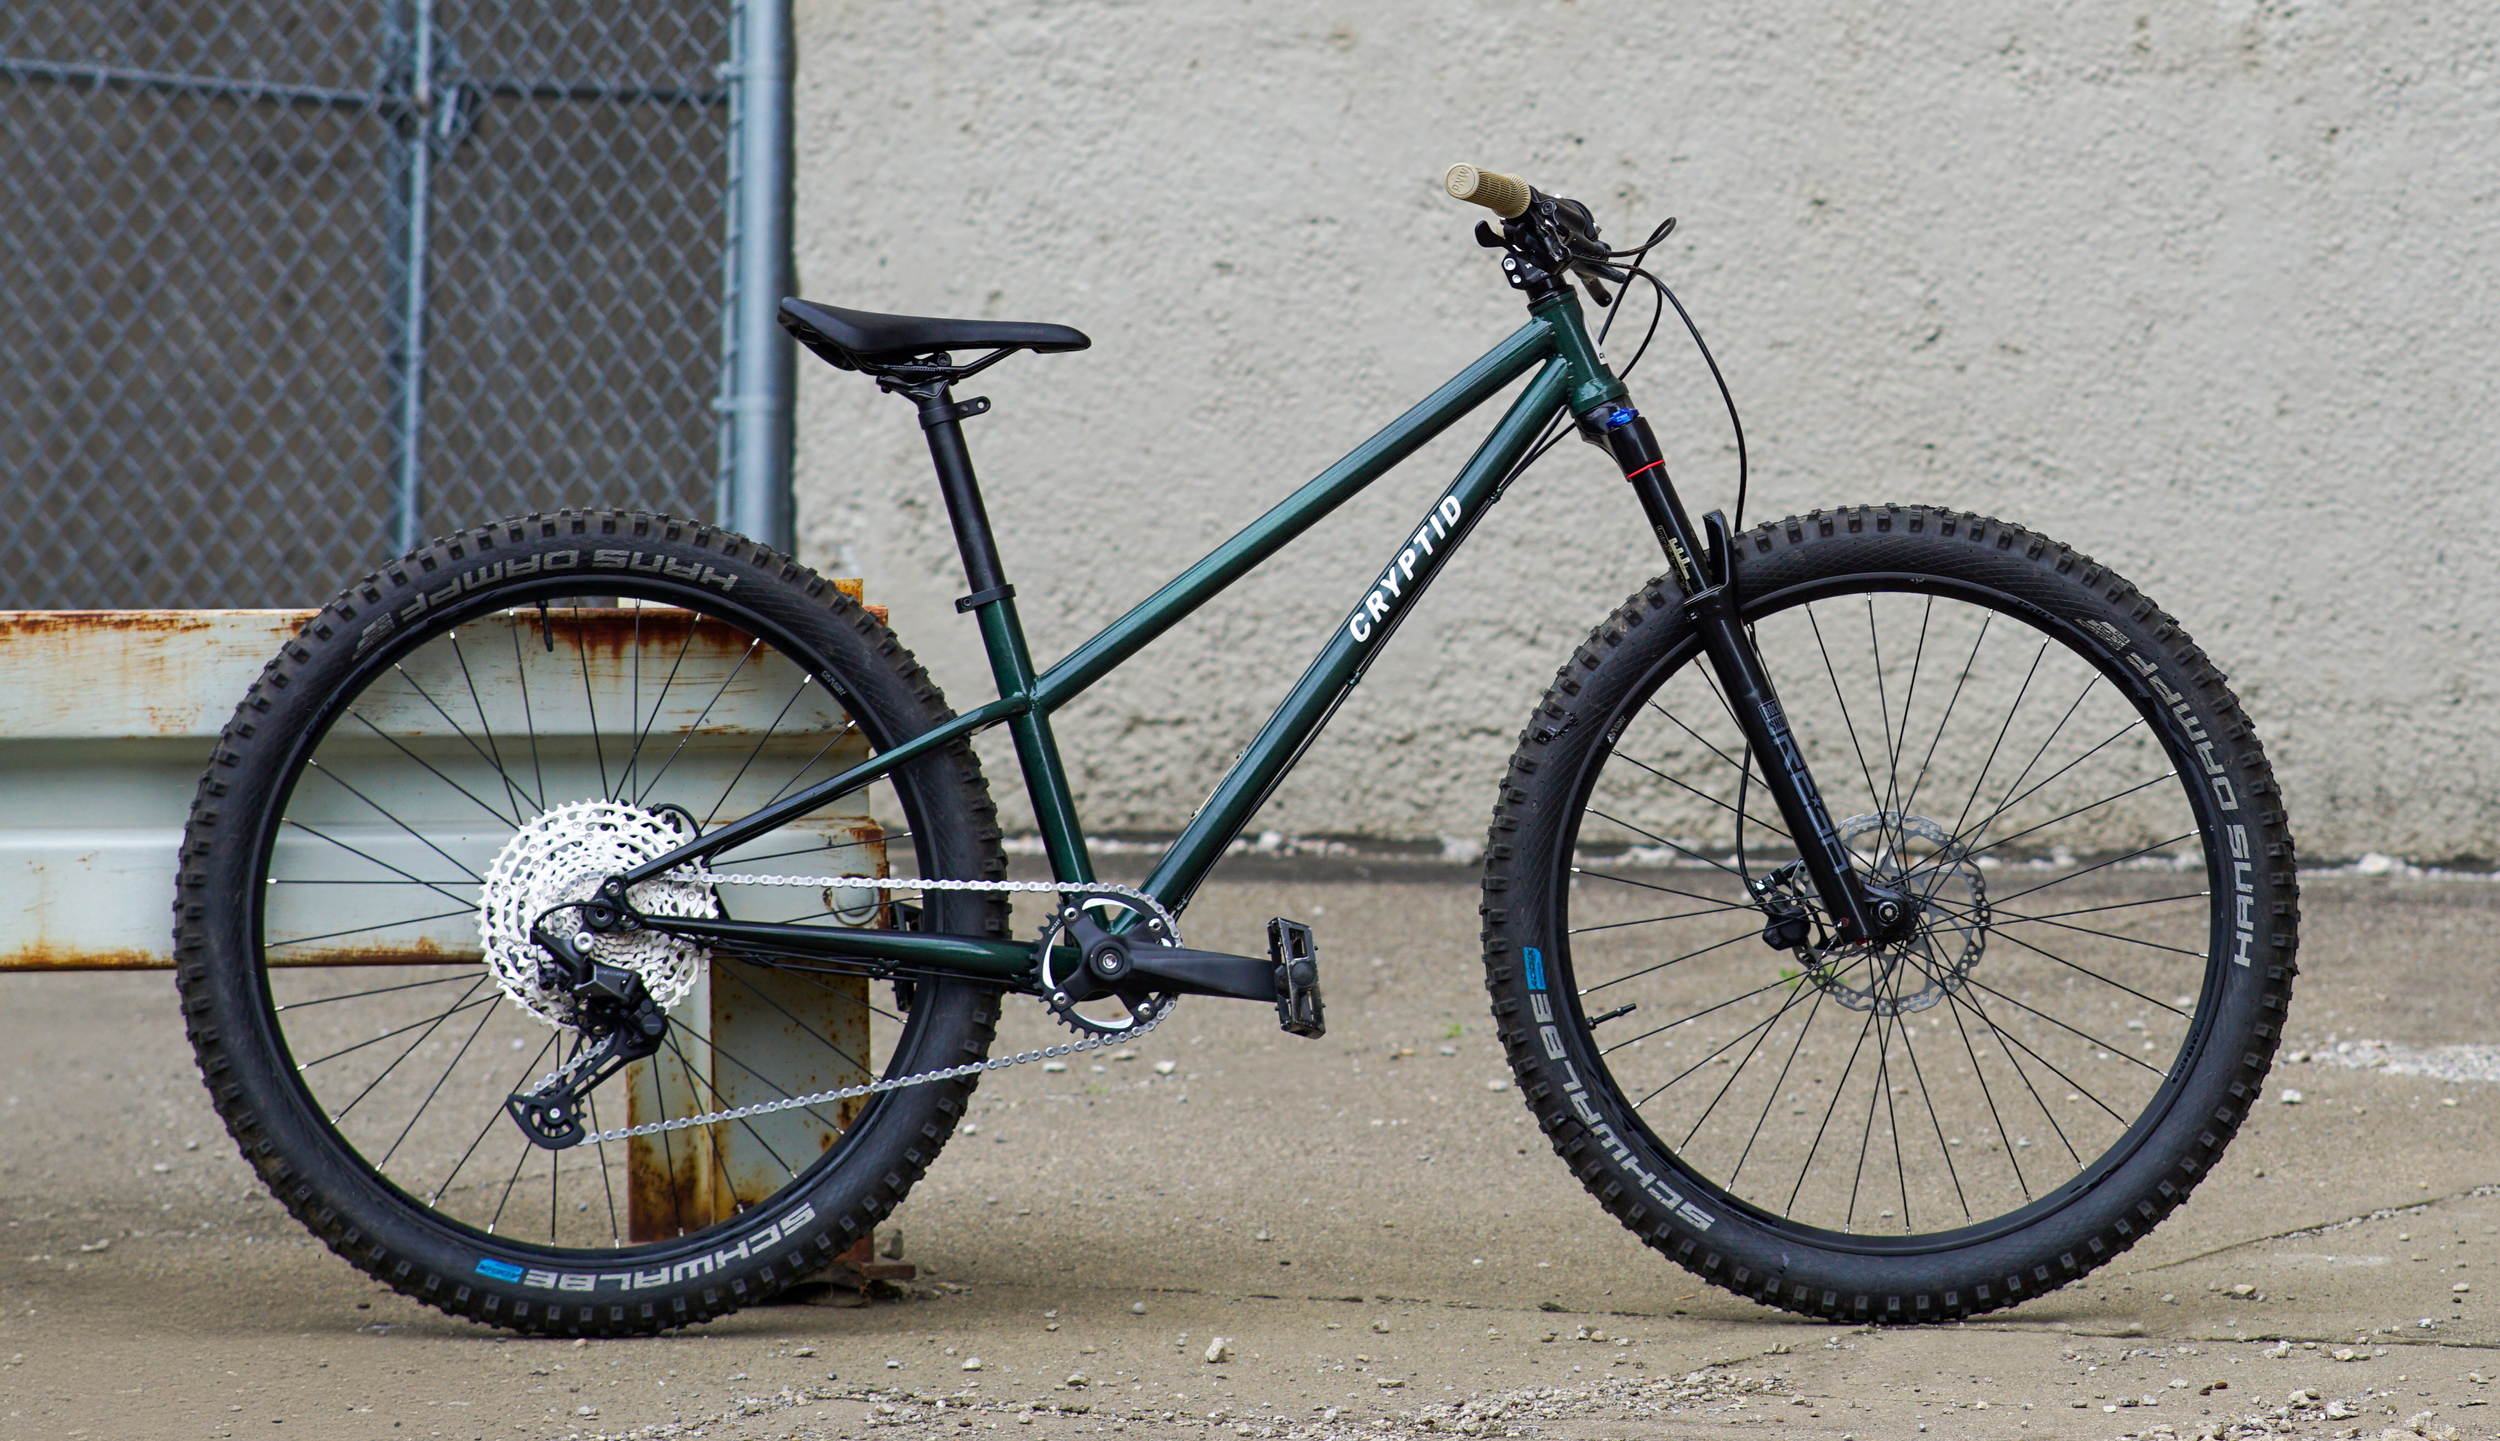
Full Suspension Assembled
After finishing all welded and machined components, I assembled the bike using off-the-shelf mountain bike components. The build kit strikes a great balance between performance and cost. For a premium visual touch, all cables were routed through the frame, rather than externally.